Apex Academy · 6 steps
Chatbot setup guide
A plain-English setup path for non-technical business owners: collect your info, teach the bot, test it, then paste or send one widget code.
Real product walkthrough
Watch the complete onboarding in 30 seconds
This is not a mockup: the video configures a real Apex account on the production interface.
WordPress installation
Put the chatbot on your website in 28 seconds
Real WordPress and WPCode footage: paste the code, save it, then verify a live customer question.
- 01
Get these 5 things ready first
You do not need code to set this up. Before opening the editor, collect five simple things: your website link, your booking link, your opening hours, your main services or prices, and the questions customers ask most often.
If you do not have every answer ready, start with what you know. You can update the chatbot any time after launch.
Use this simple format if you are unsure what to paste: Business name, what we do, who we help, opening hours, how to book, prices, and questions we answer every day.
Business name:
Website:
Booking link:
Opening hours:
Main services and prices:
Top customer questions:
Things the bot should never promise:
If you are stuck: If a field feels confusing, skip it for now. The first version only needs enough information to answer common questions and capture a lead.
Done when this step is saved and verified in your own account.
- 02
Teach the chatbot in the Knowledge Base
Open the Knowledge Base editor at /dashboard/knowledge. Paste the information you collected above.
The chatbot uses this text during every conversation. Clear, specific facts make better answers than marketing buzzwords.
If your website URL is set, you can also refresh the website crawl. That helps the bot read public pages such as services, FAQ, contact, and pricing.
Done when this step is saved and verified in your own account.
- 03
Add your booking link
Open Branding and paste the same booking link customers already use: Calendly, Fresha, Google Calendar appointment link, a contact form, or any page where a visitor can request a time.
The chatbot will share this link when a visitor wants to book. It will not pretend that an appointment is confirmed unless your real booking system confirms it.
If you do not have a booking link yet, use your contact page for now. You can replace it later.
If you are stuck: Best links start with https:// and open directly to booking or contact. Avoid sending visitors to your homepage if there is a clearer booking page.
Done when this step is saved and verified in your own account.
- 04
Test before you install
Ask the bot real questions before adding it to your website. Try opening hours, prices, booking, refunds, location, and one difficult edge case.
Good answer: the bot gives known facts, asks for contact details, and hands off booking through your real link.
Bad answer: the bot invents prices, confirms an appointment by itself, or gives advice you do not want it to give. If that happens, add the correction to the Knowledge Base and test again.
Done when this step is saved and verified in your own account.
- 05
Install the widget without coding
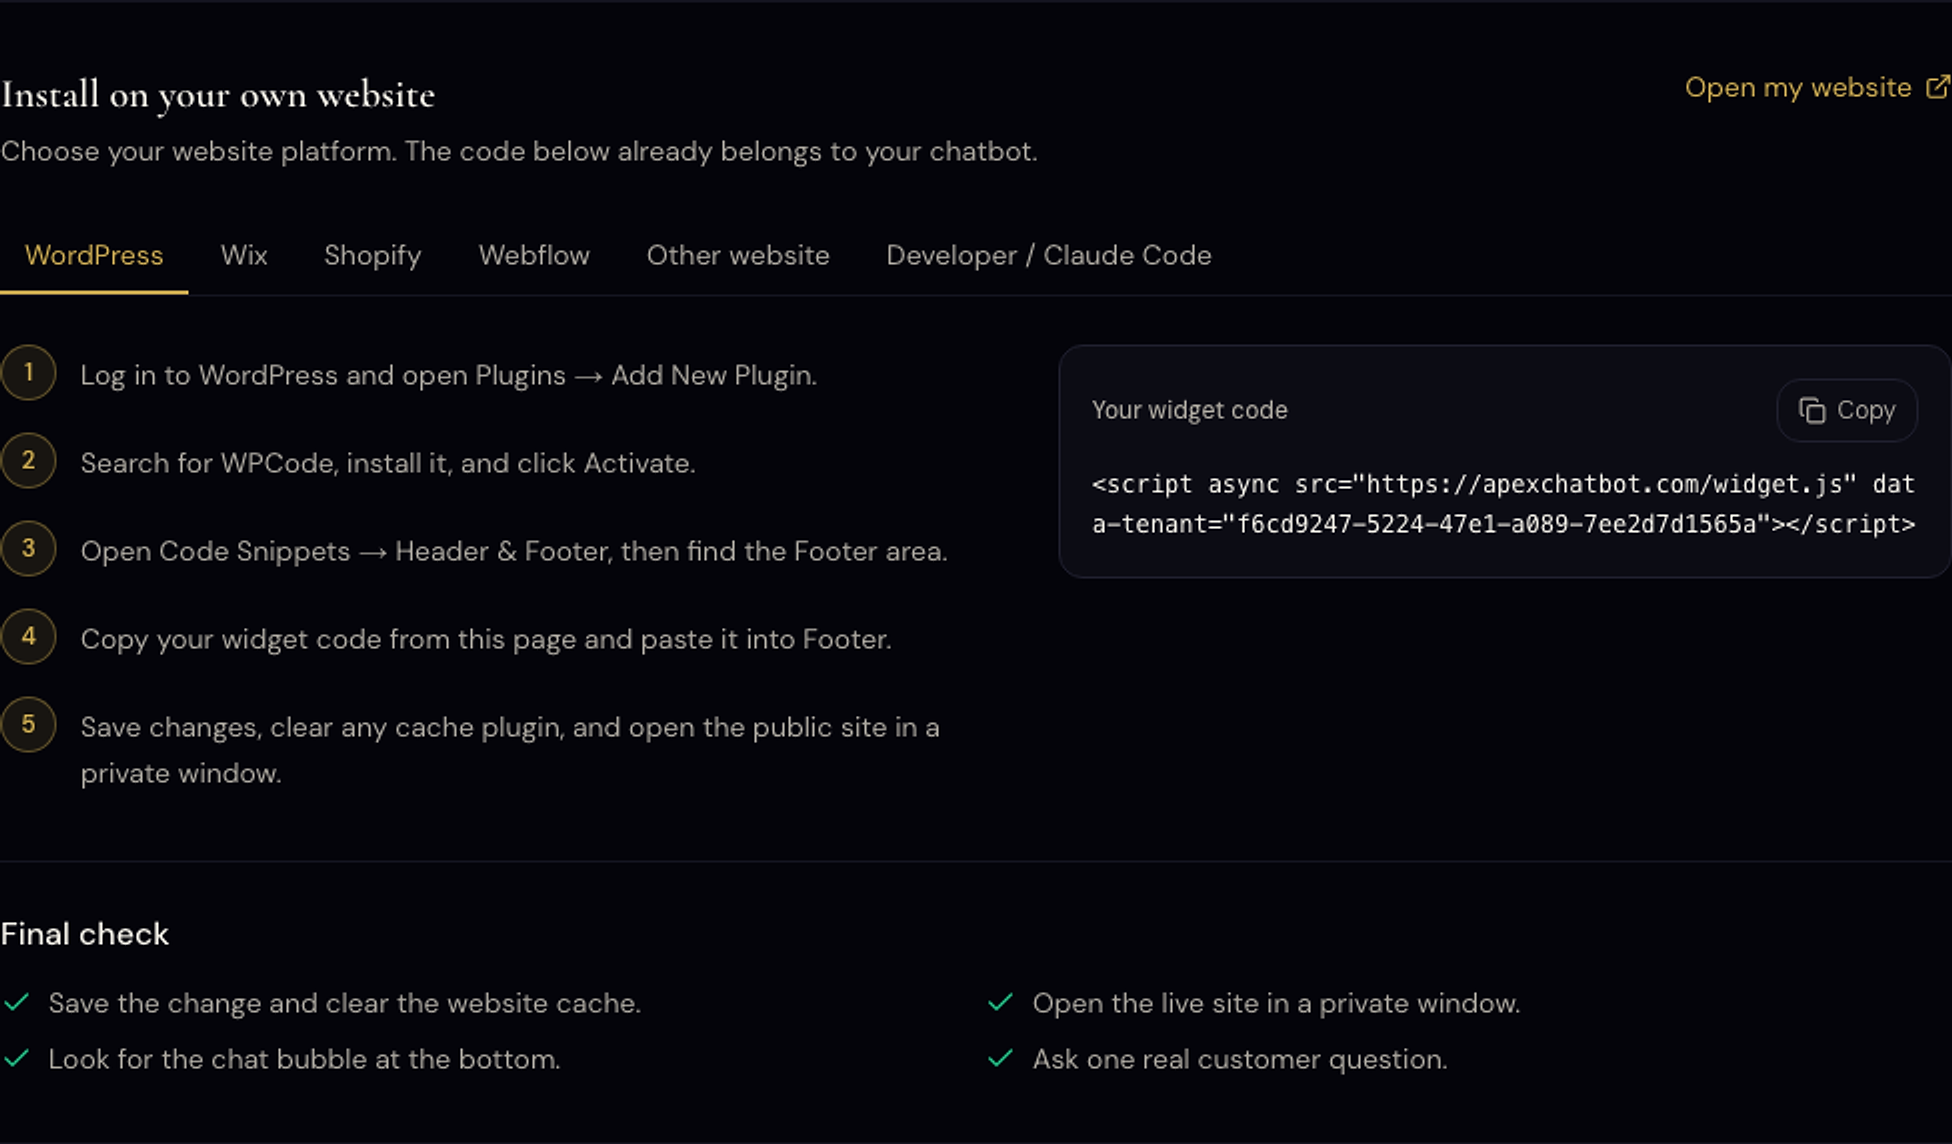
Go to the Overview section of your dashboard and scroll down to the Embed code card.
Copy the script tag shown there. If you manage your own website, paste it before the closing </body> tag. If someone else manages your website, send them the snippet and say: 'Please add this before the closing body tag on every page.'
Works on WordPress, Wix, Shopify, Webflow, and custom HTML sites. You do not need to understand the code; it only loads your chat bubble.
<script async
  src="<appUrl>/widget.js"
  data-tenant="<your-tenant-id>"></script>
If you are stuck: If the widget does not appear, check that the snippet is on the live website, clear your browser cache, and make sure your website domain is allowed in settings.
Done when this step is saved and verified in your own account.
- 06
Watch your first conversation arrive
Open your website in a private browser window and click the chat bubble. Ask a question you would expect a visitor to ask.
Head back to your dashboard and open Conversations. The exchange you just had should appear within a few seconds.
If a visitor leaves their email or phone number during the chat, Apex can send a lead notification by email when notifications are configured. Delivery timing depends on the connected email provider.
If you are stuck: No conversation showing? Make sure the snippet is on the live site (not only a local preview) and the tenant id in the snippet matches the one on your dashboard.
Done when this step is saved and verified in your own account.
Now do it in your account
The dashboard fills in your real code and settings automatically.