Apex Academy · 4 steps
Webshop setup guide
Build the storefront, add real products, choose inquiry or connected payments, and test one complete order before sharing it.
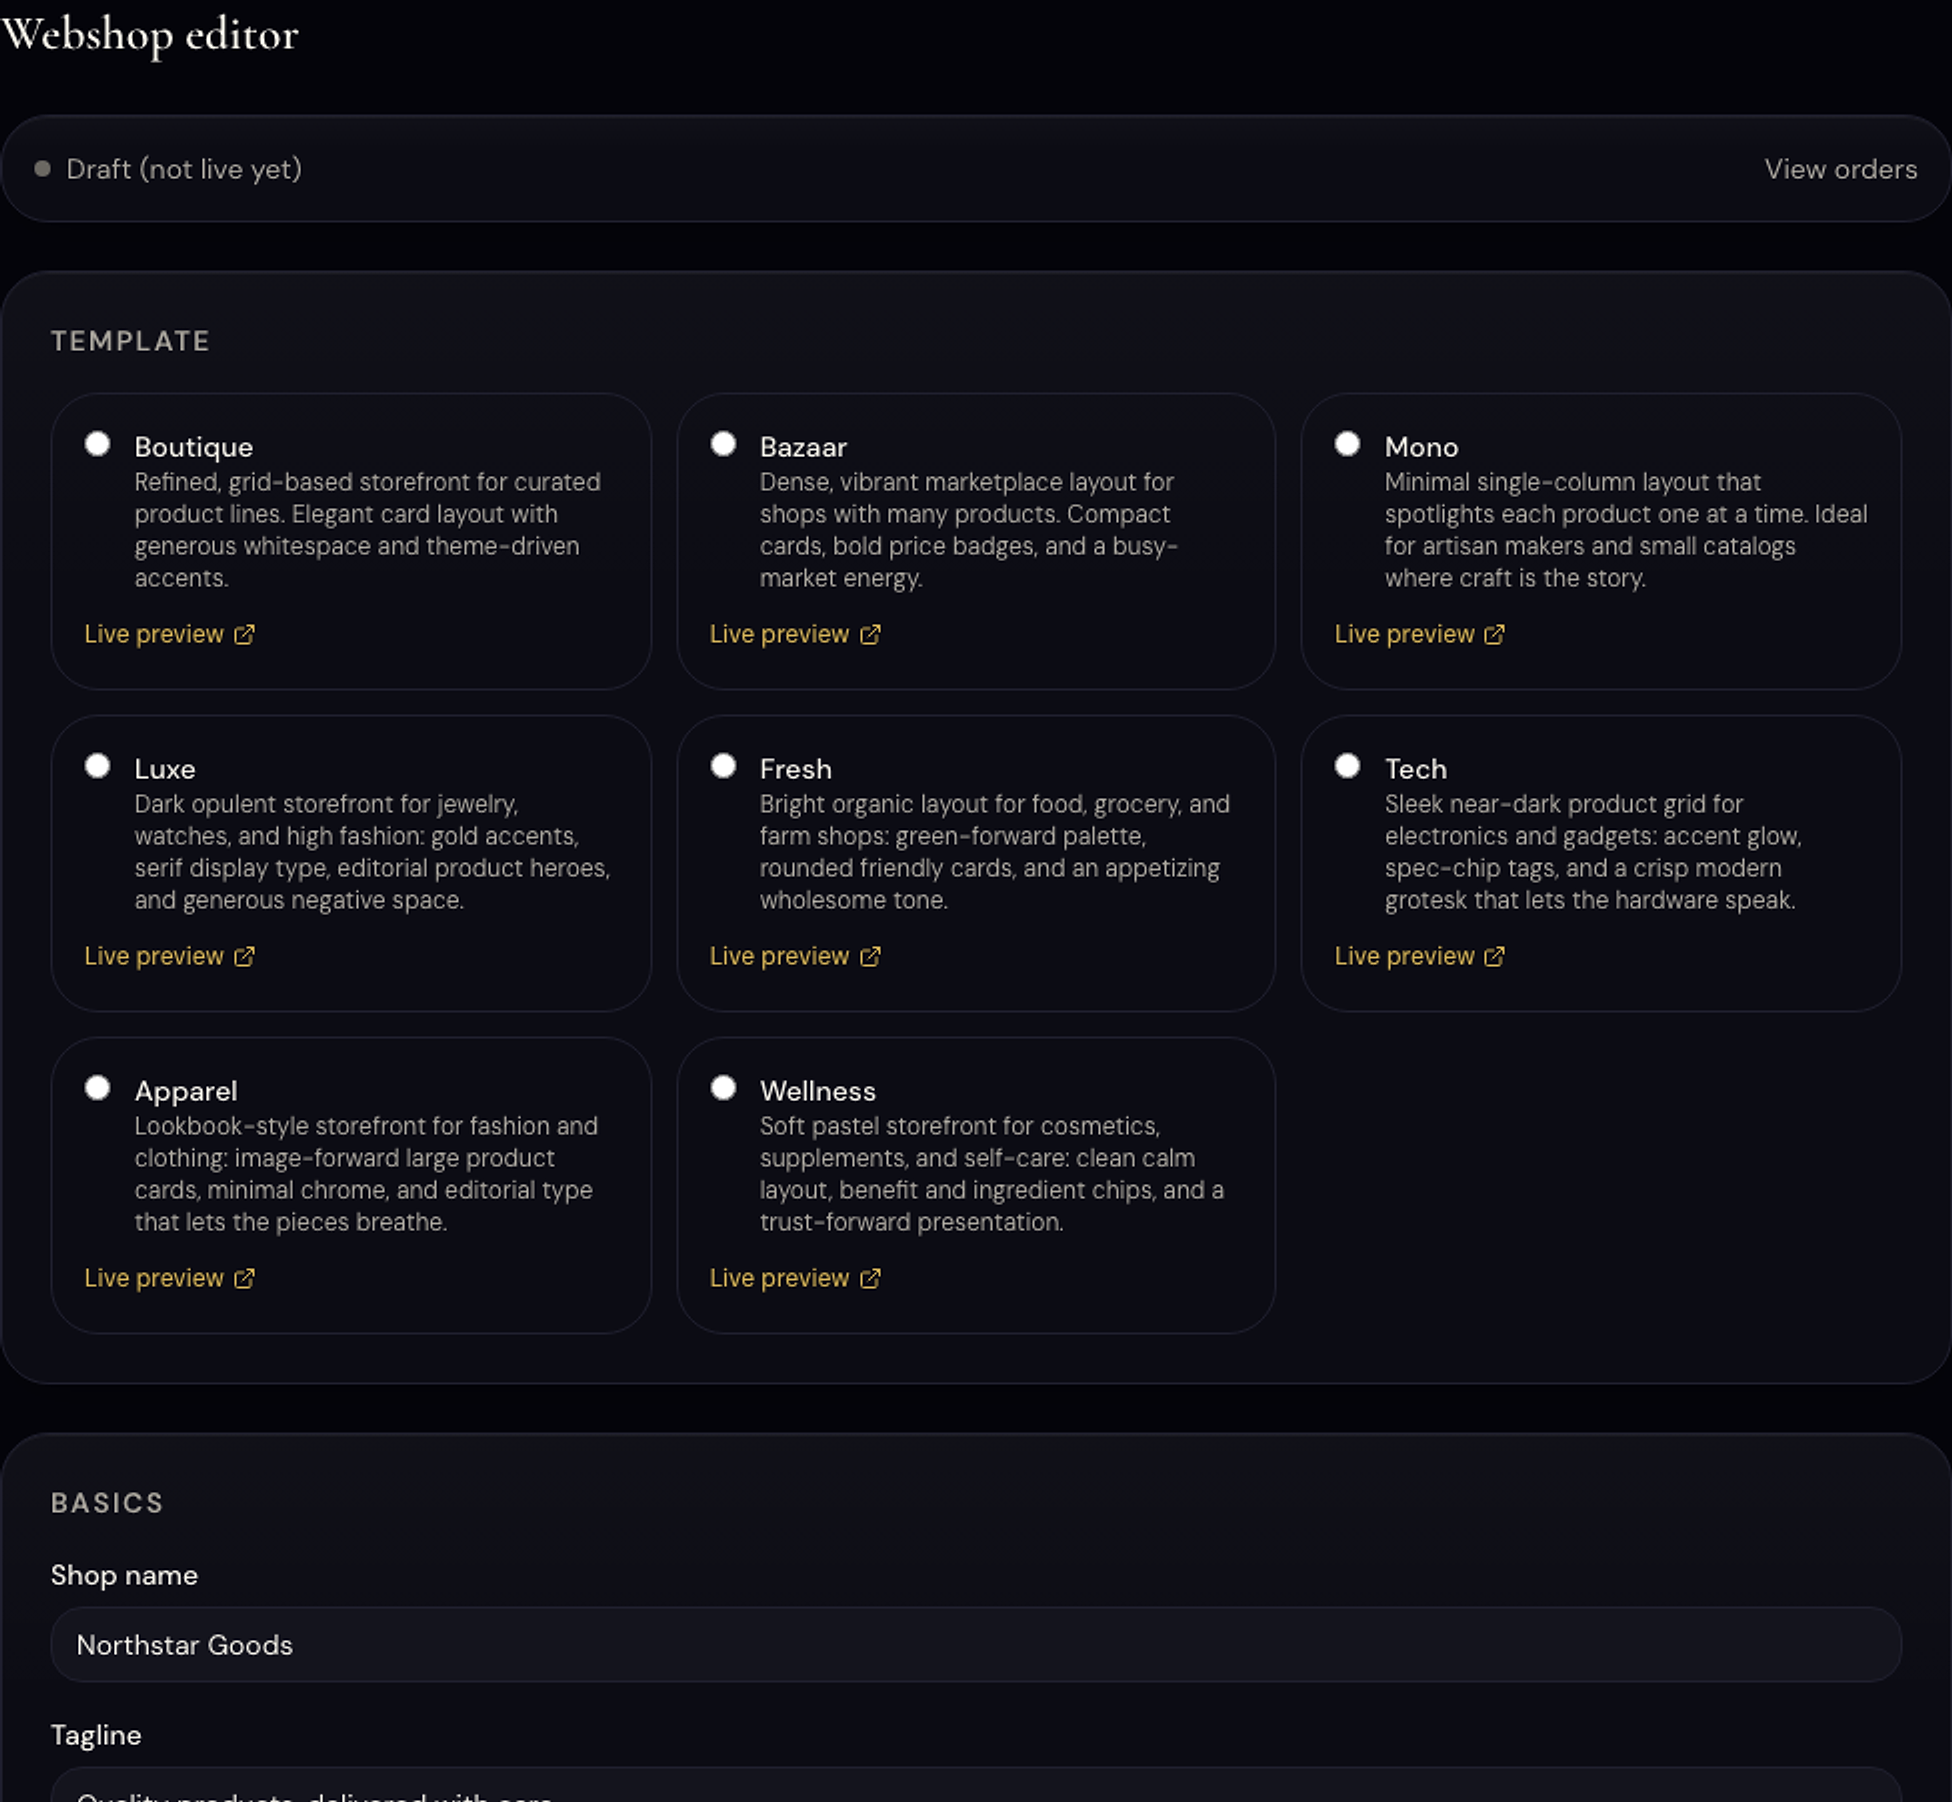
- 01
Set the store basics
Choose a template, language, currency, logo, colors, contact details, FAQ, and store announcement.
The announcement bar is best for shipping thresholds, limited offers, or a link to delivery information.
Done when this step is saved and verified in your own account.
- 02
Add the real catalog
Create each product with a clear name, description, positive price, image, currency, and SKU when you use one.
You can import or export the catalog as CSV. Review imported products before publishing; the system never invents product details for you.
Done when this step is saved and verified in your own account.
- 03
Choose how orders are completed
Inquiry checkout captures the customer's request for your team. Connected Stripe checkout takes payment only after your Stripe Connect account is ready.
Never describe an inquiry as a paid order. The dashboard shows the actual checkout mode and order status.
Done when this step is saved and verified in your own account.
- 04
Place a test order
Publish, open the store in a private window, add a product, and complete the entire checkout path using safe test data.
Confirm the order appears in the dashboard and that the customer-facing confirmation matches the checkout mode.
Done when this step is saved and verified in your own account.
Now do it in your account
The dashboard fills in your real code and settings automatically.