Apex Academy · 4 steps
Voice Receptionist setup guide
Four steps from a blank form to a live AI receptionist. Monthly plans include a 7-day trial; annual plans start at full price with no trial. Phone activation is automatic after the first paid invoice.
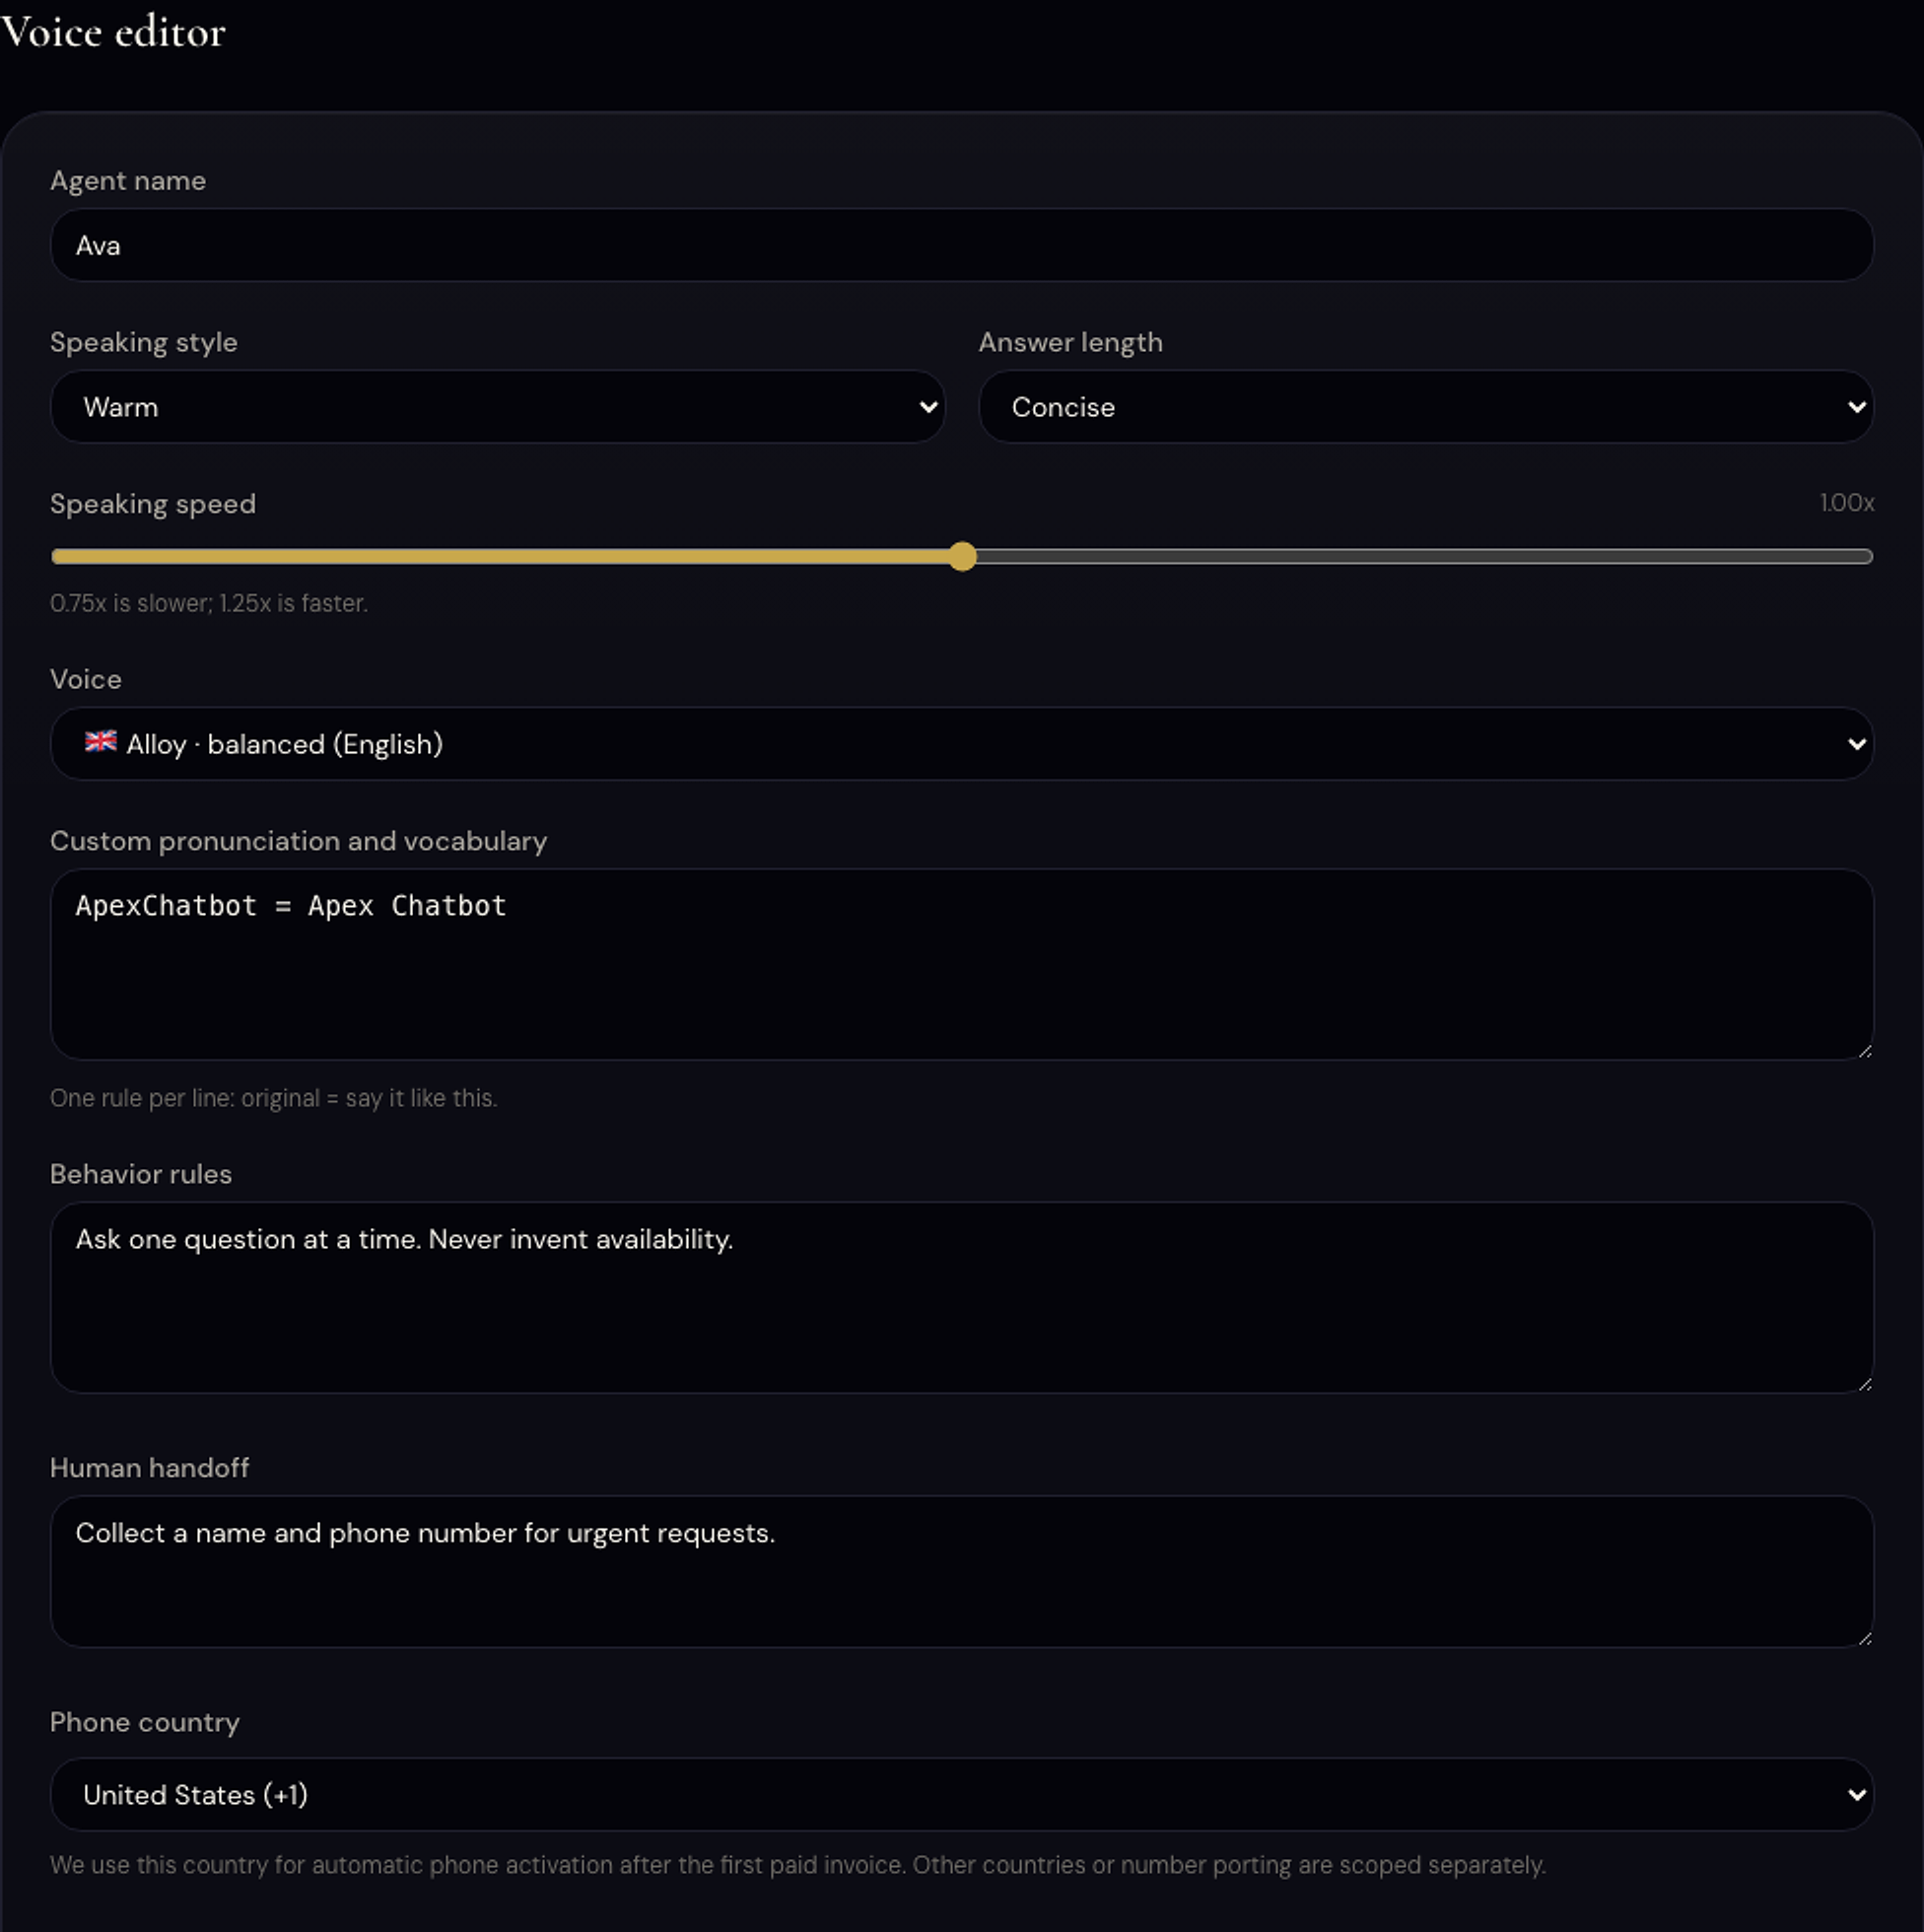
- 01
Configure your receptionist
Open /dashboard/products/voice. Fill in the Agent name field with what you want callers to hear, for example 'Apex Dental reception'.
Choose a Voice and the Language (English or Hungarian). Select your Phone country: United States (+1) or Hungary (+36). These are the only two self-serve options today.
Write the Greeting script: the exact words your agent will say at the start of every call. Keep it short and natural.
Add Business context: key facts about your business such as your address, services, and hours. The agent uses this to answer caller questions.
Done when this step is saved and verified in your own account.
- 02
Save and watch the status
Click Save. The provisioning status changes from 'pending' to 'web_demo' once your configuration is processed.
At 'web_demo' status the receptionist is ready to test in the browser. At 'provisioned' the phone line is active.
Done when this step is saved and verified in your own account.
- 03
Test the web demo before going live
The web demo is your testing surface. Monthly plans include a 7-day trial; annual plans start immediately at the full annual price. Use the Try demo button on the Voice product page to hear how your receptionist sounds.
Phone activation is automatic after the first paid invoice. A United States or Hungary phone number is assigned at that point. You do not need to do anything manually.
This is intentional: the trial gives you time to refine the greeting and business context before any real caller reaches the agent.
Done when this step is saved and verified in your own account.
- 04
What to expect once live
Once the phone number is activated, every call to that number is answered by your AI receptionist.
After each call ends you receive a structured summary by email: caller name, topic, outcome, and next step.
Leads captured during calls appear in your Conversations dashboard alongside chatbot leads.
Done when this step is saved and verified in your own account.
Now do it in your account
The dashboard fills in your real code and settings automatically.