Apex Academy · 4 steps
Website setup guide
Choose a template, replace the example content, preview it, then publish only when every contact detail is correct.
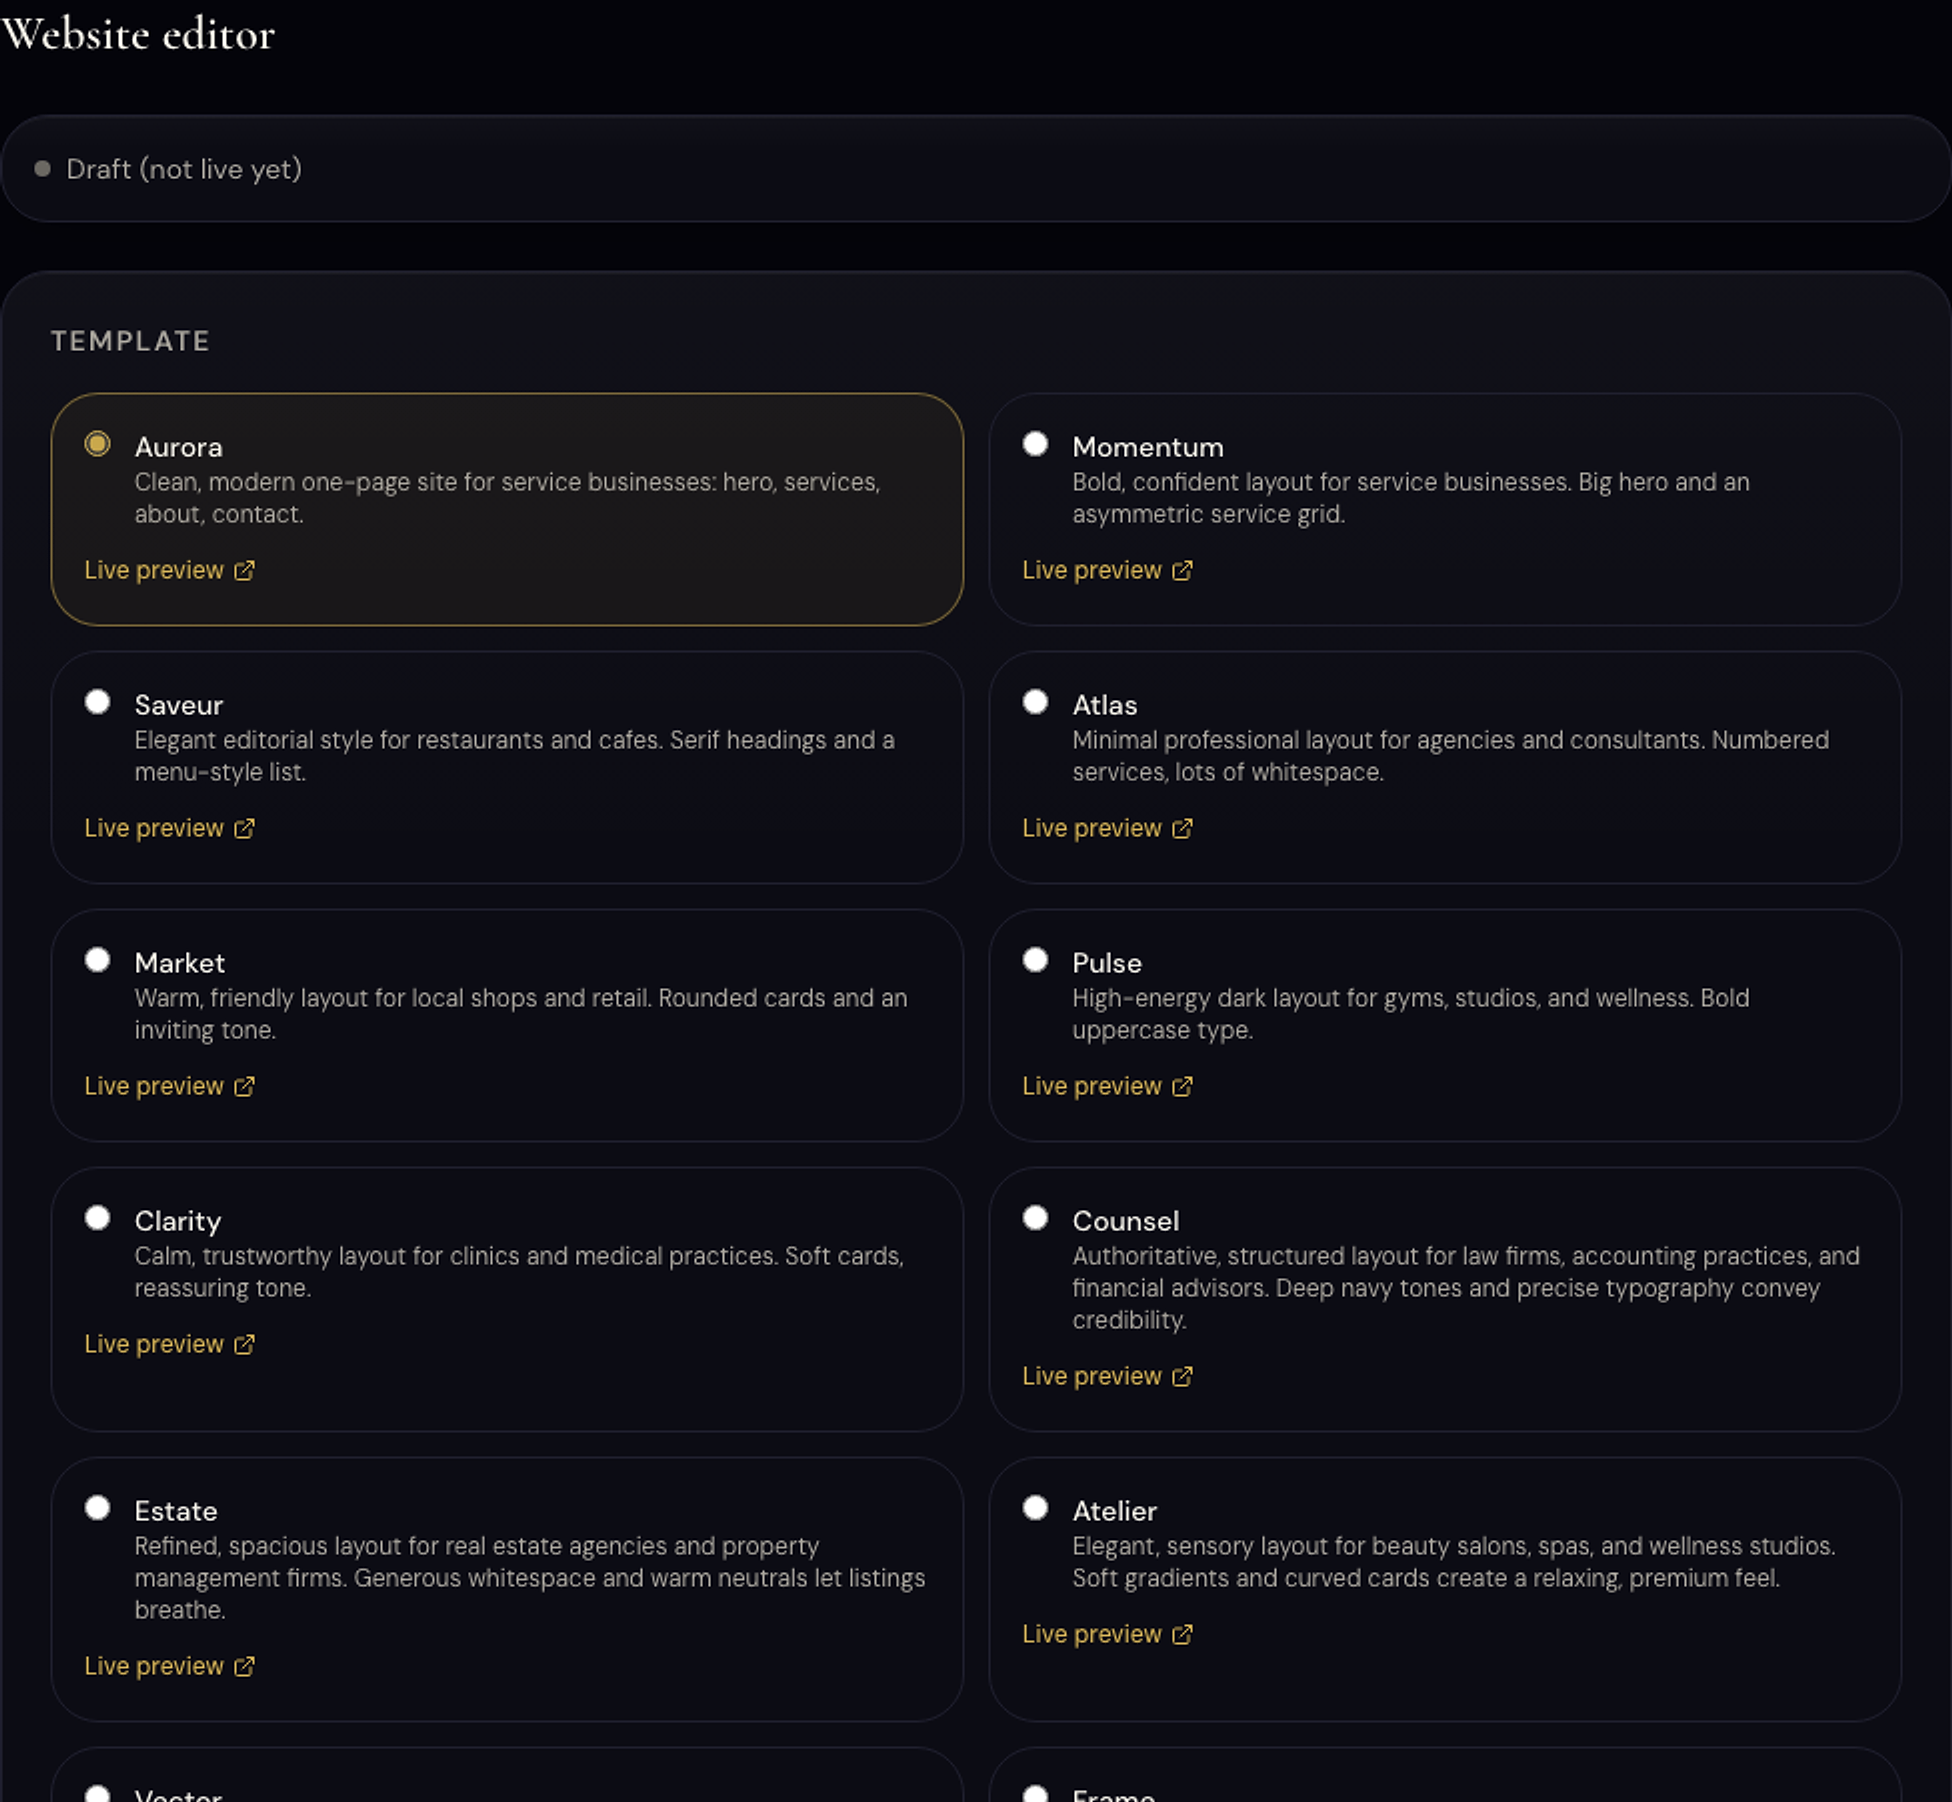
- 01
Choose the closest template
Open Website from the dashboard and preview the templates. Choose the one that already feels closest to your business; you can change it later without losing your saved content.
Do not worry about perfect colors yet. Start with structure: services, contact details, and the main action you want a visitor to take.
Done when this step is saved and verified in your own account.
- 02
Replace every example
Add your business name, logo, tagline, about text, services, phone, email, address, FAQs, and the button label.
Use the announcement bar for one timely message such as a launch offer, holiday hours, or a booking link. Leave it empty when there is nothing important to announce.
Done when this step is saved and verified in your own account.
- 03
Preview on phone and desktop
Save the draft, open the preview, and read it like a customer. Check that buttons work, phone and email are correct, and no placeholder text remains.
Ask someone else to read the first screen. They should understand what you do and how to contact you within a few seconds.
Done when this step is saved and verified in your own account.
- 04
Publish and test the live address
Publishing makes the hosted site public. Open its live address in a private window and test the contact route again.
Edits made later stay drafts until you save them; published sites can also be unpublished from the same editor.
Done when this step is saved and verified in your own account.
Now do it in your account
The dashboard fills in your real code and settings automatically.