Apex Academy · 3 steps
Automation setup guide
Three steps to activate AI-drafted follow-ups for your leads. Every draft waits in an approval queue: nothing goes out without your one-click approval.
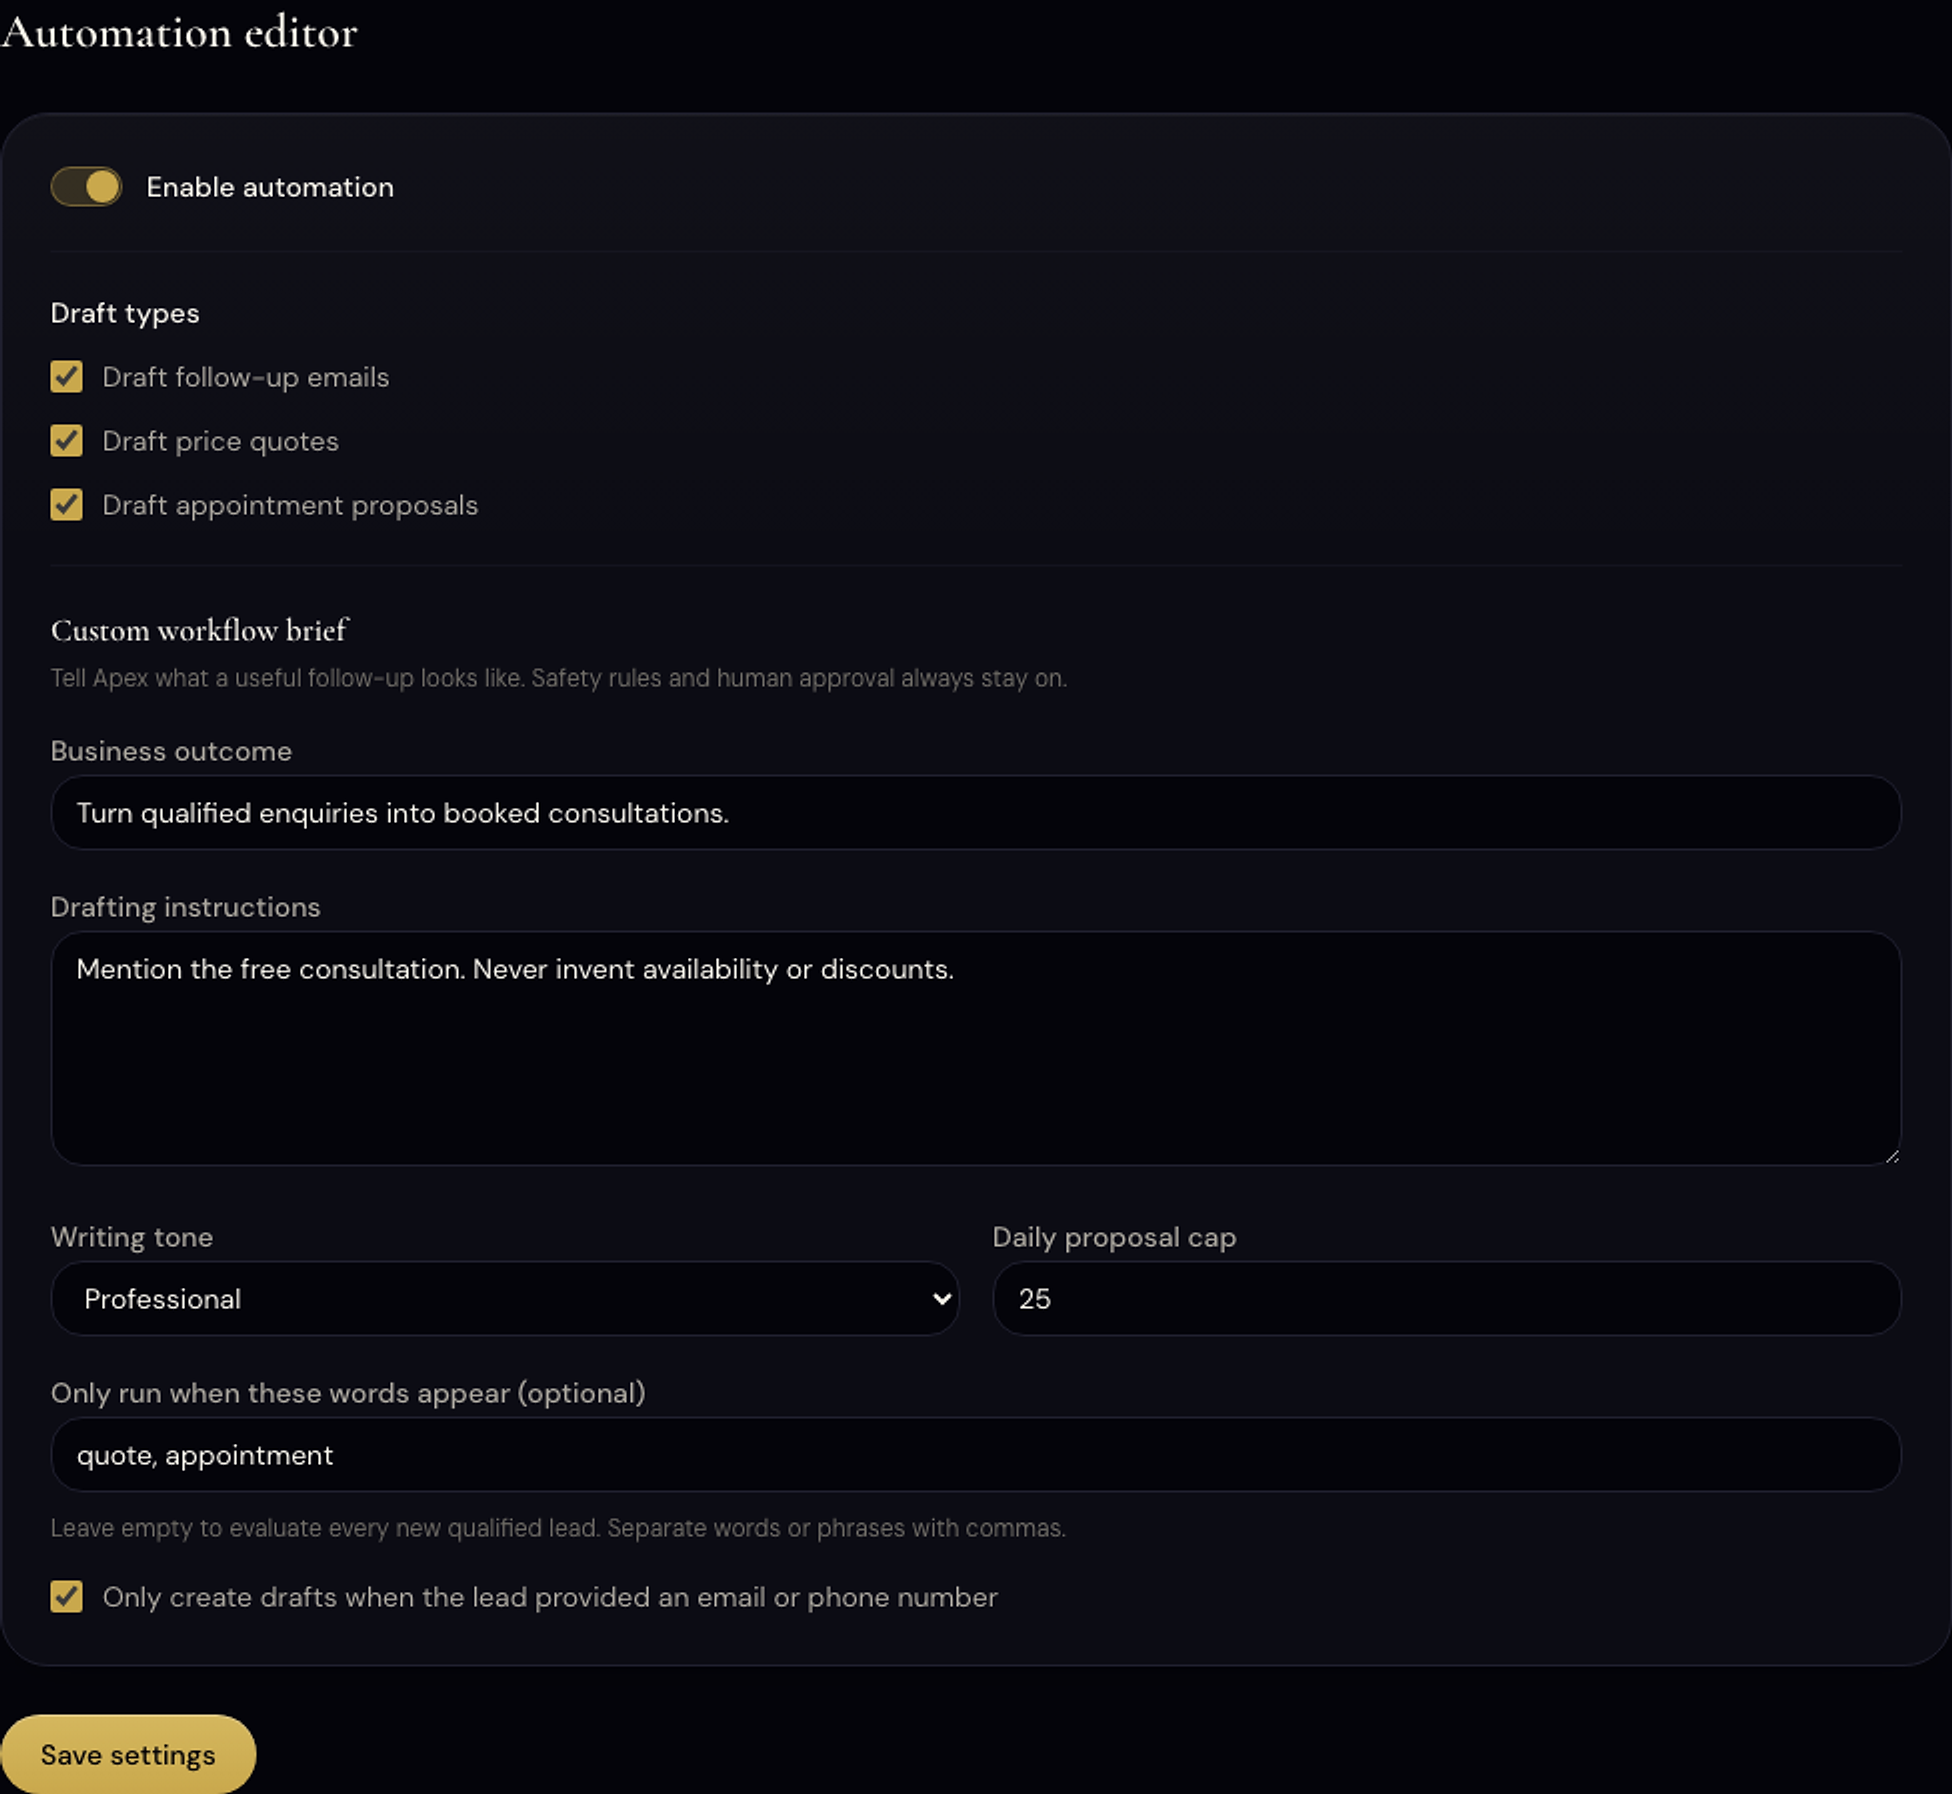
- 01
Enable automation and choose draft types
Open /dashboard/products/automation. Flip the 'Enable automation' toggle to turn the feature on.
Choose which types of drafts Apex may prepare when a new lead arrives. The three options are: follow-up emails (sent to the lead after your approval), price quote drafts (routed to your inbox for final handling), and appointment proposal drafts (also routed to your inbox).
Turn on only the types that make sense for your business. You can change this at any time.
Done when this step is saved and verified in your own account.
- 02
Drafts land in your Approval Queue
When a qualified lead comes in via the chatbot, the system drafts the selected follow-up types and places them in your queue at /dashboard/automation.
Open the queue to review each draft. You can read the full content and edit it before approving.
Done when this step is saved and verified in your own account.
- 03
Approve with one click: nothing sends without you
Each draft has an Approve button and a Dismiss button. Approving a follow-up email sends it to the lead. Approving a quote or appointment draft routes it to your owner inbox.
Nothing is ever sent automatically. Every action is logged in your Audit log so you always know what went out and when.
If you are stuck: No drafts appearing? Trigger a test by starting a conversation via your chatbot widget and leaving a contact detail. A draft should appear in the queue within a minute of the conversation ending.
Done when this step is saved and verified in your own account.
Now do it in your account
The dashboard fills in your real code and settings automatically.